Last December, I saw a very simple and cute scarf knitted by Angie (le monde de sucrette) and I thought to knit one for me, too, but then I was busy with the gifts to prepare for family and friends back in Italy .... so nothing was done for me!!!
Luckily, some days ago, while browsing through my blogs list, I found a post from Ilaria (IDA interior lifestyle), who was proposing the same (she added a pompom!) piece of clothing .... I didn't have any excuse to wait longer for knitting my own triangular scarf!!!! ;oD
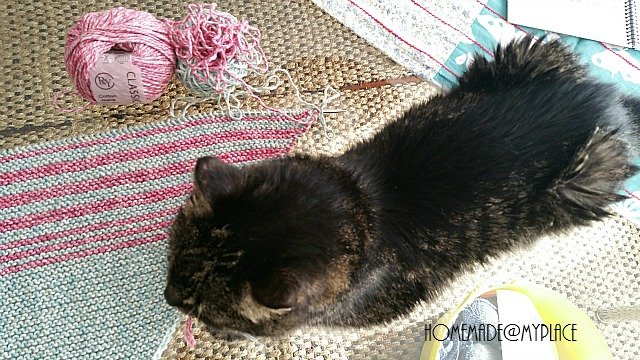
So, I started ....


Do you want to start one, too ???
Well, you need :
I used the LONG TAIL CAST ON method (here) on two knitting needles and I put on 3 stitches.
My first row is like : slip first stitch from left needle onto right needle
knit one
Kfb (knit into front and back of stitch), that is the way to increase and create an
extra stitch
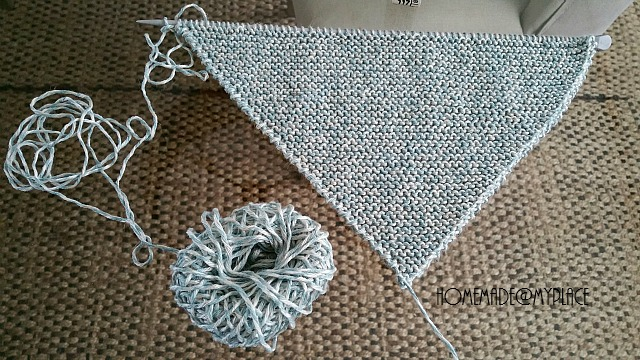
This pattern is very simple! At the beginning of each row you have to slip the first stitch from one needle to another, without working it. The stitches in between the first stitch and the last stitch need to be knitted (garter stitch), while the last stitch of every row is the one you use to increase the number of your stitches, just adding an extra stitch!
So, for the following rows, just follow : slip first stitch, knit the stitches in between, increase in the last stitch !!!!
Little by little, your triangle will get bigger and bigger ...


A little recap :
at the end of first row, you'll have 4 stitches ...
at the end of row 7 : 10 stitches
at the end of row 10 : 13 stitches
at the end of row 17 : 20 stitches
at the end of row 20 : 23 stitches
at the end of row 27 : 30 stitches
at the end of row 30 : 33 stitches
at the end of row 37 : 40 stitches
at the end of row 40 : 43 stitches
.... and so on !!!! (at the end of row 97 : 100 stitches!!!)
I've decided to introduce the new colour (sierra, see in above list) at the beginning of row 98, where I start the pattern made of stripes. Do not cut the first yarn, as it will be used in the between of the stripes !!! ;oD
If you are interested in how to join the new yarn, just look here !!!

After some rows, it will be like this ...

and the pattern to follow, if you like, is the following :
rows 98 and 99 : red
rows 100 and 101 : blue
rows 102 and 103 : red
rows 104 and 105 : blue
rows 106 and 107 : red


Then you start enlarging the red stripes (4 rows instead of just 2):
rows 108 and 111 : blue
rows 112 and 115 : red
rows 116 and 119 : blue
rows 120 and 123 : red
rows 124 and 127 : blue
rows 128 and 131 : red
rows 132 and 135 : blue


to complete the stripy pattern, just go back to the two stripes repeat :
rows 136 and 137 : red
rows 138 and 139 : blue
rows 140 and 141 : red
rows 142 and 143 : blue
rows 144 and 145 : red
After that, you can cut the red yarn and continue to the end just with the blue one!


My knitting ended at row 202 (205 stitches), as my yarn finished ..... luckily, I reached a good dimension for my scarf (91cmx53cm, where 53 stands for the height), so I can wear it!! ;oD

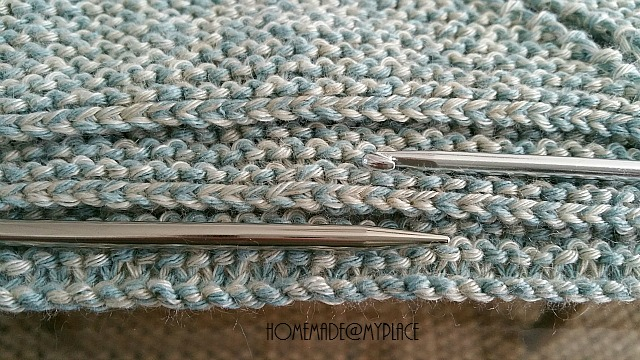
For the cast off, I went for the crochet cast-off method (here), as it doesn't need any extra yarn!!
So I used my 4mm hook and I obtained a very neat edge


Then, I started to trim in all the tails ...


Last thing, the tassels (3), one for each corner of the scarf ..

The tassels were simply made just wrapping 20 times the yarn around my palm (you can use even cardstock if you prefer!) (see here).
To attach each tassel, I used a 4,5mm hook and some red yarn : Starting with a SC (single crochet in US crochet terminology), I attached the yarn to the corner and then I crocheted 10 chains, cut the yarn and fasten off. Each tassel has been attached with a couple of knots to this braid (braid = 14 cm length, while the tassel is 9cm long).
So, this is what I got ...


.... and on me ....

.... a really happy me !!!! ;o)))))
What about you????
xxxx Alessandra and have a HAPPY WEEKEND !!!
.... and a BIG THANK YOU to both Angie and Ilaria!!!! SMACK !!!
Today links : Craft Schooling Sunday
Luckily, some days ago, while browsing through my blogs list, I found a post from Ilaria (IDA interior lifestyle), who was proposing the same (she added a pompom!) piece of clothing .... I didn't have any excuse to wait longer for knitting my own triangular scarf!!!! ;oD
So, I started ....


Do you want to start one, too ???
Well, you need :
- some yarn ! My personal choice was : Lana Grossa Basics Calmo (59% acrylic, 24% cotton and 17% linen), shade 207. All my 4 balls of yarn (50g each) have been used for this project. Then 2 balls (50g each) from Rowan Classic Cotton Jeans Yarn (100% cotton), shade 365-Sierra, for both stripes and tassels!
- a pair of 4,5mm knitting circular needles or, if you prefer, a pair of long straight needles, as you'll have at least 205 stitches on them at the end (or more if you like to knit on!)
- a pair of scissors
- a couple of hooks (optional), 4mm and 4,5mm. I needed them for the "crochet cast-off" method (look here) and for joining the tassels to the corners of the scarf.
- a yarn needle
- a tape measure (optional)
I used the LONG TAIL CAST ON method (here) on two knitting needles and I put on 3 stitches.
My first row is like : slip first stitch from left needle onto right needle
knit one
Kfb (knit into front and back of stitch), that is the way to increase and create an
extra stitch
This pattern is very simple! At the beginning of each row you have to slip the first stitch from one needle to another, without working it. The stitches in between the first stitch and the last stitch need to be knitted (garter stitch), while the last stitch of every row is the one you use to increase the number of your stitches, just adding an extra stitch!
So, for the following rows, just follow : slip first stitch, knit the stitches in between, increase in the last stitch !!!!
Little by little, your triangle will get bigger and bigger ...


A little recap :
at the end of first row, you'll have 4 stitches ...
at the end of row 7 : 10 stitches
at the end of row 10 : 13 stitches
at the end of row 17 : 20 stitches
at the end of row 20 : 23 stitches
at the end of row 27 : 30 stitches
at the end of row 30 : 33 stitches
at the end of row 37 : 40 stitches
at the end of row 40 : 43 stitches
.... and so on !!!! (at the end of row 97 : 100 stitches!!!)
I've decided to introduce the new colour (sierra, see in above list) at the beginning of row 98, where I start the pattern made of stripes. Do not cut the first yarn, as it will be used in the between of the stripes !!! ;oD
If you are interested in how to join the new yarn, just look here !!!

After some rows, it will be like this ...

and the pattern to follow, if you like, is the following :
rows 98 and 99 : red
rows 100 and 101 : blue
rows 102 and 103 : red
rows 104 and 105 : blue
rows 106 and 107 : red


Then you start enlarging the red stripes (4 rows instead of just 2):
rows 108 and 111 : blue
rows 112 and 115 : red
rows 116 and 119 : blue
rows 120 and 123 : red
rows 124 and 127 : blue
rows 128 and 131 : red
rows 132 and 135 : blue


to complete the stripy pattern, just go back to the two stripes repeat :
rows 136 and 137 : red
rows 138 and 139 : blue
rows 140 and 141 : red
rows 142 and 143 : blue
rows 144 and 145 : red
After that, you can cut the red yarn and continue to the end just with the blue one!


My knitting ended at row 202 (205 stitches), as my yarn finished ..... luckily, I reached a good dimension for my scarf (91cmx53cm, where 53 stands for the height), so I can wear it!! ;oD

For the cast off, I went for the crochet cast-off method (here), as it doesn't need any extra yarn!!
So I used my 4mm hook and I obtained a very neat edge

Then, I started to trim in all the tails ...


Last thing, the tassels (3), one for each corner of the scarf ..

The tassels were simply made just wrapping 20 times the yarn around my palm (you can use even cardstock if you prefer!) (see here).
To attach each tassel, I used a 4,5mm hook and some red yarn : Starting with a SC (single crochet in US crochet terminology), I attached the yarn to the corner and then I crocheted 10 chains, cut the yarn and fasten off. Each tassel has been attached with a couple of knots to this braid (braid = 14 cm length, while the tassel is 9cm long).
So, this is what I got ...


.... and on me ....

.... a really happy me !!!! ;o)))))
What about you????
xxxx Alessandra and have a HAPPY WEEKEND !!!
.... and a BIG THANK YOU to both Angie and Ilaria!!!! SMACK !!!
Today links : Craft Schooling Sunday
Please, show me your makes on IG using the following hashtag : #homemadeatmyplaceoriginals or tagging me @alessandrapoggiagliolmi .
Text, Design and Photography : Alessandra Poggiagliolmi
All Rights Reserved. No part of this pattern may be reproduced or transmitted in any form or by any means, without the prior written permission of the copyright holder.
Hi, what a great scarf and nice wool/cotton. Looks great on you, byebye
ReplyDeletethank you Francien!!!! xxxxx Ale
DeleteHi Ale,
ReplyDeleteAfter seeing your photo earlier on instagram I thought I better pop over to your blog to take a look!
Thanks for the great tutorial, I really love your shawl! Funnily enough I never tried to knit a triangle shawl this way, I made one starting from the long end and then decreased every row! Mine is just black but it is very fluffy (Alpaca Boucle yarn).
The yarn you used looks lovely and soft!
Have a nice weekend!
Ingrid xx
Myfunkycrochet.blogspot.be
Hi Ingrid!!!!
DeleteGlad you like it!!! It's funny to discover how many different ways there are to knit a simple triangle!!!! ;oD
see you soon, xxxxx Ale
He happy knitter what a beautiful scarf you made.
ReplyDeleteGrtz,
Chris
thank you Chris!!! ;oD
Deletexxxxx Ale
Beautiful!
ReplyDeleteI'm already wondering how it would look with an increase at the beginning and end...I'm after a 'flatter' triangle...will have to sample!
Love it! Great colors!
ReplyDeleteStupendissimo,Ale!Mi piace un sacco:anche l'idea delle righe di colore diverso è vincente!Bravissima!
ReplyDeleteYour patience paid off! Lovely colours to go with jeans! Enjoy your weekend Alessandra! :)
ReplyDeleteBeautiful Ale!
ReplyDeleteVery nice! A beautiful color combination (the blue perfect for jeans and I especialle like the pink) and the stripes perfectly positioned. The tassels are the icing on the cake :-). Sunny greetings, Nata
ReplyDeleteSo fun to see something knitted from you! Thanks so much for sharing on craft schooling Sunday!
ReplyDeleteit's nice to try different crafts, right?
Deletexxxxx Ale
it's nice to try different crafts, right?
Deletexxxxx Ale
I love the colours you have chosen. Muted, and with a splash of pink.
ReplyDeletethank you!!!!
Deletexxxxx Ale
This comment has been removed by the author.
DeleteI'm glad to see you are making things now for YOU! Lovely scarf. I'd like to do something similar in crochet. Have seen many granny square ones like this. Have a good afternoon.
ReplyDeletegreat job Alessandra...perfect
ReplyDeletegreatings send you Conny
thank you
ReplyDeleteحراج السيارات
Oooooooooooooohhh!!!! m'encaaaanta!
ReplyDeleteels colors també són preciosos! ets una artista!
Que tinguis un bon dia, Ale!
Very cute!!
ReplyDeleteKate :}